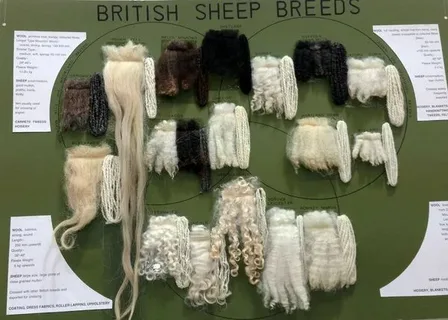
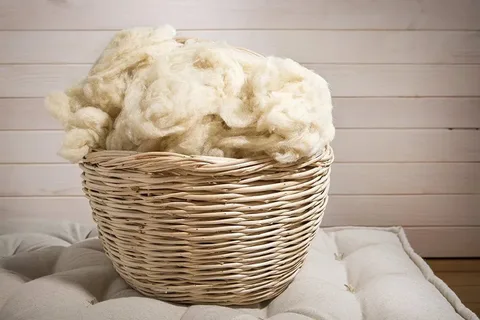
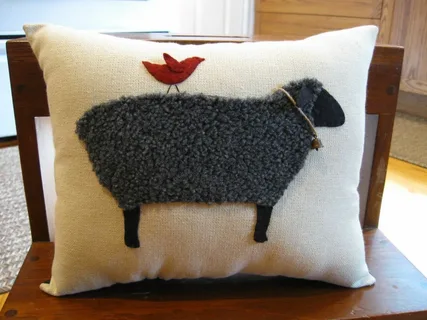
Kitchen accessories serve both a functional and aesthetic purpose, enhancing the overall cooking and dining experience. With Pine Knoll Sheep Wool, you can create beautiful, elegant, and practical kitchen accessories that stand out for their quality and craftsmanship. This guide will walk you through the process of crafting various kitchen accessories using Pine Knoll Sheep Wool, from selecting the right yarn to finishing your projects. Let’s delve into how you can elevate your kitchen decor with these exquisite handmade items.

Why Choose Pine Knoll Sheep Wool for Kitchen Accessories?
Superior Quality and Durability
Pine Knoll Sheep Wool is renowned for its superior quality and durability. The fine fibers create a yarn that is not only soft but also strong and long-lasting. This makes it an ideal choice for kitchen accessories that need to withstand regular use and washing.
Heat Resistance and Insulation
Wool is a natural insulator, providing excellent heat resistance. This makes Pine Knoll Sheep Wool perfect for creating kitchen accessories such as pot holders, oven mitts, and trivets that require thermal protection. The insulating properties of wool help keep your hands safe from heat and your surfaces protected from hot dishes.
Eco-Friendly and Sustainable
Pine Knoll Sheep Wool is produced using sustainable farming practices that prioritize animal welfare and environmental stewardship. By choosing this wool, you are supporting eco-friendly practices and contributing to a more sustainable future. Wool is also biodegradable, making it an environmentally responsible choice.
Essential Materials and Tools
Materials:
- Pine Knoll Sheep Wool yarn (various colors and weights depending on the project)
- Knitting needles or crochet hooks (appropriate sizes for your chosen yarn)
- Yarn needle for weaving in ends
- Scissors
- Stitch markers (optional)
- Button or embellishments (optional for specific projects)
Tools:
- Measuring tape
- Row counter (optional)
- Blocking mats and pins (optional for finishing)

Choosing the Right Patterns
Elegant Table Runners
A table runner can transform your dining table, adding a touch of elegance and style. Pine Knoll Sheep Wool provides the perfect texture and drape for a beautiful table runner.
Pattern Instructions:
- Cast On: Using your preferred cast-on method, cast on the desired number of stitches to achieve the width of your table runner (typically 60-80 stitches for a standard width).
- Pattern: Choose a pattern that showcases the beauty of the wool, such as a lace design or a simple garter stitch with color changes.
- Length: Knit or crochet the runner to the desired length, ensuring that it fits your table. A standard table runner is about 60-72 inches long.
- Finishing: Bind off all stitches and weave in the ends. Block the table runner to even out the stitches and enhance the pattern.
Functional Pot Holders
Pot holders are essential kitchen accessories that provide protection from hot pots and pans. Pine Knoll Sheep Wool’s heat resistance makes it ideal for this purpose.
Pattern Instructions:
- Cast On: Cast on 30-40 stitches using a sturdy, heat-resistant stitch pattern like garter stitch or double crochet.
- Pattern: Work in the chosen stitch pattern until the pot holder reaches a square shape (approximately 8×8 inches).
- Loop: Create a small loop for hanging by chaining 10-15 stitches and securing it to one corner of the pot holder.
- Finishing: Bind off all stitches and weave in the ends. Consider adding a double layer for extra heat protection.
Elegant Coasters
Coasters protect your surfaces from heat and moisture while adding a decorative touch to your table setting. Pine Knoll Sheep Wool’s absorbency makes it ideal for coasters.
Pattern Instructions:
- Cast On: Cast on 20-25 stitches using your preferred method.
- Pattern: Work in a decorative stitch pattern such as moss stitch, granny square, or a simple garter stitch. Create a set of four to six coasters in different colors or patterns for variety.
- Finishing: Bind off all stitches and weave in the ends. Block the coasters if necessary to ensure they lay flat.
Stylish Oven Mitts
Oven mitts are essential for handling hot dishes safely. Pine Knoll Sheep Wool’s insulating properties make it perfect for creating sturdy and stylish oven mitts.
Pattern Instructions:
- Cast On: Cast on the required number of stitches to fit around your hand (typically 40-50 stitches) and join in the round.
- Ribbing: Work in a ribbing pattern (K2, P2) for 1-2 inches to create a snug cuff.
- Pattern: Continue working in stockinette stitch until the mitt reaches the base of your thumb.
- Thumb Gusset: Create a thumb gusset by increasing stitches as needed and working in rounds until the thumb is the desired length. Transfer the thumb stitches to a holder and continue working the body of the mitt.
- Length: Knit or crochet the mitt until it covers your fingers, then decrease stitches to close the top.
- Thumb: Transfer the thumb stitches back to the needles or hook and work in rounds until the thumb is complete.
- Finishing: Bind off all stitches and weave in the ends. Repeat for the second mitt.
Adding Custom Touches
Decorative Edging
Adding a decorative edging to your kitchen accessories can elevate their appearance. Consider a scalloped edge, picot trim, or a simple crochet border to add a touch of elegance.
Embroidery
Personalize your kitchen accessories with embroidery. Use contrasting colors of Pine Knoll Sheep Wool to add initials, floral motifs, or geometric designs. Embroidery adds a unique and personal touch to your handmade items.
Colorwork
Incorporate colorwork into your kitchen accessories by using different shades of Pine Knoll Sheep Wool. Stripes, checkerboard patterns, or more complex fair isle designs can add visual interest and make your accessories stand out.
Tips for Successful Crafting
Gauge Swatch
Always create a gauge swatch before starting your project to ensure the correct fit and size. Different yarns and needle or hook sizes can result in variations in gauge, so it’s important to measure and adjust as needed.
Blocking
Blocking your finished kitchen accessories can help even out the stitches and improve their overall appearance. Gently wash the items in lukewarm water with a mild wool wash, then lay them flat on blocking mats and shape them to the desired dimensions. Pin in place and allow to dry completely.
Proper Tension
Maintaining consistent tension while knitting or crocheting is key to achieving an even fabric. If your stitches are too tight or too loose, adjust your technique or switch to a different needle or hook size.
Maintaining Your Kitchen Accessories
Maintaining your kitchen accessories is essential for ensuring they remain in good condition, function effectively, and last for years. Proper care not only keeps your kitchen looking neat and organized but also helps prevent the buildup of harmful bacteria and prolongs the lifespan of your tools. Here are some detailed steps and tips for maintaining various kitchen accessories:
1. Utensils (Knives, Spoons, Spatulas)
- Cleaning: Wash your utensils immediately after use to prevent food from drying and sticking. Use warm, soapy water and a soft sponge. For wooden utensils, avoid soaking them, as this can cause warping and cracking.
- Drying: Dry utensils thoroughly with a clean towel before storing them to prevent rust or mildew, especially for metal and wooden items.
- Sharpening Knives: Regularly sharpen your knives using a honing steel or a professional sharpening service to keep them in top condition. Dull knives can be more dangerous as they require more force to use.
2. Cookware (Pots, Pans, Baking Sheets)
- Non-Stick Cookware: Use only plastic or wooden utensils to avoid scratching the non-stick surface. Clean with a soft sponge and avoid abrasive materials that could damage the coating.
- Stainless Steel and Cast Iron: For stainless steel, use mild detergents and avoid steel wool, which can cause scratching. Cast iron requires special care; wash it with minimal soap, dry immediately, and apply a thin layer of oil to maintain its seasoning and prevent rust.
- Baking Sheets: Line your baking sheets with parchment paper or silicone mats when baking to reduce residue buildup. If your baking sheets become stained, soak them in warm water and baking soda to lift grease and burnt-on food.
3. Small Appliances (Blenders, Toasters, Coffee Makers)
- Regular Cleaning: Clean small appliances regularly to maintain their functionality. Disassemble parts like blender blades or toaster crumb trays and wash them with soap and water. Avoid immersing electrical parts in water.
- Descaling Coffee Makers: For coffee makers, descale them periodically using a vinegar solution to remove mineral buildup and keep them running efficiently.
- Checking Cords: Inspect power cords for wear and tear. If you notice any damage, replace the appliance to avoid potential hazards.
4. Cutting Boards
- Sanitizing: Cutting boards, especially those used for raw meat, should be sanitized with a vinegar solution or diluted bleach after use to prevent cross-contamination.
- Maintenance for Wooden Boards: Wooden cutting boards require occasional oiling with food-grade mineral oil to keep them from drying out and cracking. Avoid using them for cutting raw meat to prevent bacteria from seeping into the wood.
- Plastic Boards: These are dishwasher-safe, making them easy to clean and sanitize. However, once they become deeply scratched, consider replacing them as bacteria can hide in the grooves.

5. Glassware and Dishes
- Handling and Washing: Handle glassware carefully to avoid chips or cracks. When washing, use a soft sponge and mild detergent. Avoid harsh scrubbers that can scratch delicate surfaces.
- Removing Stains: For coffee or tea stains, use a baking soda paste or vinegar solution. Soak stained dishes in the solution before scrubbing to make the process easier.
6. Storage and Organization
- Proper Storage: Organize your kitchen accessories in a way that minimizes clutter and damage. Store knives in knife blocks or magnetic strips rather than loose in drawers to prevent dulling and accidents.
- Dry Environment: Ensure your storage areas are dry to prevent mildew or rust, especially for metal and wooden items. Add moisture absorbers in cabinets if necessary.
7. Periodic Inspections
- Regularly check your kitchen accessories for wear and tear. Replace any damaged items promptly, such as chipped glassware, frayed electrical cords, or rusted utensils.
- Keep an eye on the expiration dates of any components that may wear out over time, such as rubber gaskets on blenders or filters in coffee machines.
By following these detailed steps, you can maintain the quality and functionality of your kitchen accessories, ensuring a clean, efficient, and safe cooking environment. Proper care not only extends the life of your tools but also enhances your overall cooking experience.
Advanced Project Ideas
Cabled Table Runner
For a more advanced project, consider a cabled table runner. Cables add texture and complexity, creating a stunning effect.
Pattern Instructions:
- Cast On: Cast on the desired number of stitches for the width of your table runner.
- Ribbing: Work in a ribbing pattern (K2, P2) for the first 1-2 inches.
- Cable Panel: Begin the cable pattern in the center of the runner, surrounded by stockinette or garter stitch on either side.
- Length: Continue working the cable pattern until the runner reaches the desired length.
- Finishing: Bind off all stitches and weave in the ends. Block the table runner to enhance the cable pattern.
Lace Pot Holders
Lace pot holders are both functional and decorative, adding elegance to your kitchen.
Pattern Instructions:
- Cast On: Cast on 30-40 stitches using a sturdy stitch pattern like garter or seed stitch.
- Lace Pattern: Incorporate a lace pattern in the center of the pot holder, surrounded by a sturdy border.
- Loop: Create a loop for hanging by chaining 10-15 stitches and securing it to one corner of the pot holder.
- Finishing: Bind off all stitches and weave in the ends. Block the pot holders to enhance the lace pattern.